Clideo Video Editor: A Simple Guide to Better Online Video Editing
Creating a polished video used to mean downloading large editing software, learning a complicated interface, and spending hours figuring out where every tool was hiding. That’s not necessarily the case anymore. With a browser-based video editor, many everyday editing jobs can be handled without installing traditional desktop software. Clideo Video Editor takes this approach by bringing video, images, audio, text, subtitles, and other editing functions into one online workspace, while features such as its subtitle generator can help creators quickly add captions to their videos.
The bigger question, though, isn't simply whether an online editor can cut a video. It can. The more useful question is whether it can make your entire workflow easier. If you're creating YouTube videos, social media clips, tutorials, product demonstrations, presentations, short-form content, or marketing videos, you want an editor that gets out of your way instead of becoming another problem to solve. That's where Clideo becomes interesting. Its current editor uses a multi-track timeline and a focused workspace for working with different media elements, while additional tools handle jobs such as video compression, resizing, subtitle generation, audio-to-text conversion, and video-to-text conversion.
What Is a Clideo Video Editor?
Clideo Video Editor is a browser-based online video editing tool designed to let users create and modify videos without installing conventional editing software. Instead of downloading a large application and managing its installation, you can open the editor in a supported browser and start a project. Clideo's current help documentation describes the service as an online platform for editing video, audio, and images, with both free access options and a paid Clideo Pro plan.
The editor is built around a timeline where you can combine different media elements. Clideo currently describes the Video Editor as an all-in-one workspace that can combine and manage video, images, text, and music. Its tools also include functions for trimming, cropping, resizing, changing speed, adding subtitles, adding audio, and creating other types of media content. That makes the platform particularly useful for creators who don't want to jump between separate applications every time they need to perform a simple task.
Why Choose an Online Video Editor?
There’s a certain appeal to keeping things simple. If you only need to trim a clip, add a title, place background music underneath it, create captions, and export the result, you don't necessarily need a heavyweight editing application. An online editor can provide the tools you actually use without forcing you to learn a huge collection of professional controls first.
Clideo says its tools work from a browser without requiring software installation and support common media formats. Its current documentation also lists support for cloud sources such as Google Drive, Google Photos, and Dropbox for certain workflows. This can be handy when your footage is spread across devices or stored online. Rather than treating editing as a complicated technical process, you can approach it more like assembling a project: bring in the media, arrange it, polish it, and export the finished result.
Understanding the Clideo Video Editor Interface
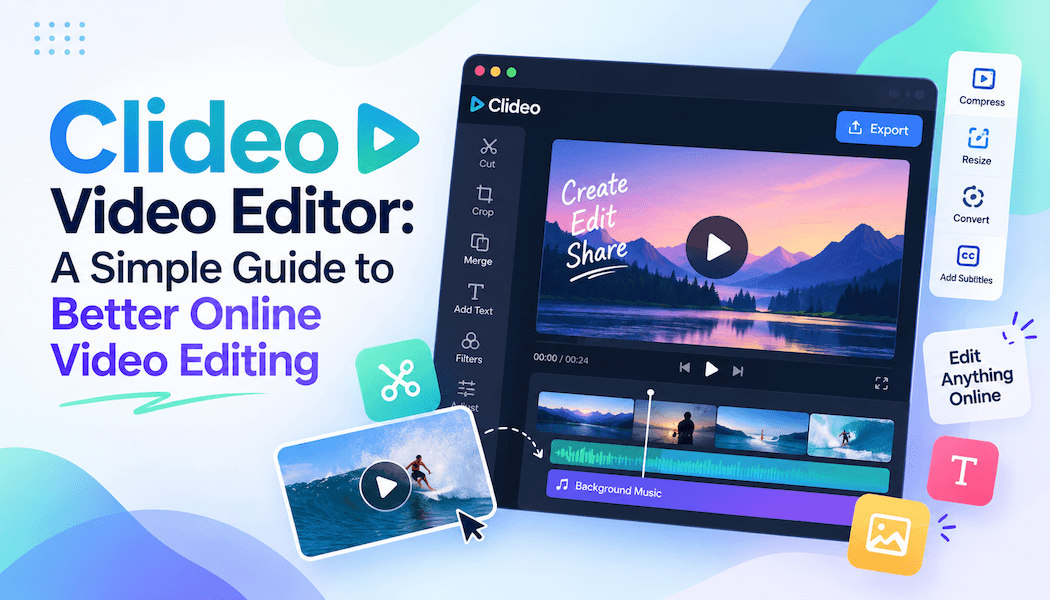
The interface is one of the first things worth exploring before you start a serious project. Clideo's current editor presents a main canvas, a timeline, and controls for adding media and editing project elements. The editor also currently includes areas for AI Agent, media, canvas, text, audio, video, image generation, elements, subtitles, recording, and text-to-speech.
Don't worry about learning every button immediately. That's a common trap with editing software. You see a dozen options and assume you need to understand all of them before you can begin. You don't. Start with the core workflow: import your media, put it on the timeline, trim unwanted sections, arrange the remaining clips, add supporting elements, preview the result, and export. Once you're comfortable with that basic rhythm, the additional features become much easier to understand.
How to Start a Video Project in Clideo
Starting a project is relatively straightforward. Clideo's current instructions explain that users can upload media from their device, use supported cloud storage sources, or record audio and video directly in the browser. This means your project doesn't have to begin with a perfectly organized folder on your computer.
A sensible approach is to collect your essential footage first. If you're making a YouTube tutorial, for example, you might have a camera recording, screen recording, background music, a logo, and a few images. Upload those elements before you start making detailed cuts. Having everything available at the beginning is like putting all your ingredients on the kitchen counter before cooking; you'll spend less time stopping halfway through the recipe to search for something.
Build Your Video on the Timeline
The timeline is where the project starts to feel like an actual video rather than a collection of files. You can arrange clips, images, audio, text, and other elements according to the story you want to tell. Clideo's current editor uses a multi-track timeline, allowing different types of media to be organized within the same project.
This is where good editing decisions matter more than flashy effects. Start by removing anything that doesn't contribute to the message. Long pauses, repeated sentences, accidental movements, unnecessary introductions, and awkward transitions can make a video feel slower than it needs to be. Once the rough cut works, you can start thinking about music, text, transitions, captions, and visual polish. A clean timeline usually leads to a cleaner final video.
Trim and Split Unwanted Footage
One of the most basic editing tasks is also one of the most important: cutting out material that doesn't belong. Almost every video has some dead space. Maybe you stopped recording before speaking, repeated a sentence, or left several seconds of silence between sections.
Clideo provides tools for cutting and splitting videos, while the Video Editor lets you manage media elements directly on the timeline. The trick isn't simply to cut aggressively. You want the pacing to feel natural. Remove unnecessary pauses, but don't turn every sentence into a rapid-fire sequence. Viewers need enough breathing room to understand what you're saying.
Add Text to Make Important Information Clearer
Text can serve many purposes in a video. It can introduce a speaker, highlight a product feature, identify a location, display a key statistic, or reinforce something being said aloud. Used properly, text becomes part of the storytelling rather than decoration.
Clideo's current toolset includes options for adding text to videos and customizing elements such as font, size, and color. Keep your text readable, though. Fancy fonts may look attractive in a design mockup but become difficult to read when they're sitting over moving footage. When in doubt, prioritize contrast and simplicity.
Add Music Without Overpowering the Video
Background music can completely change the mood of a video. A quiet track can make a tutorial feel warmer, while energetic music can give a promotional clip more momentum. The problem starts when the music becomes louder than the person speaking.
Clideo's editor supports adding audio and music to projects, and its current platform also provides separate audio-related tools. When using music beneath narration, listen carefully to the balance. The viewer should never have to strain to understand the speaker because the soundtrack is competing for attention.
Create Subtitles With Clideo
Subtitles are no longer something reserved for films and television. They're now a practical part of online video creation, particularly for educational content, social media, interviews, tutorials, and marketing videos.
Clideo currently allows users to create subtitles manually, import an SRT file, or generate subtitles automatically from speech in supported workflows. Subtitles can also be edited and styled, and Clideo's current Video Editor supports subtitle tracks within projects.
There's an important detail here: Clideo's documentation says its generated subtitles are hard-coded into exported videos, meaning they are burned into the video rather than being a player-controlled subtitle track. That can be useful for social content because the captions remain visible regardless of the viewer's playback settings.
Use the Auto Subtitle Generator
Typing subtitles manually can become tedious surprisingly quickly. That's where an auto subtitle generator can save time. Clideo's current tool can automatically generate subtitles from a video or audio file, after which users can edit the generated text and timing.
Automatic transcription isn't magic, however. Clideo specifically recommends using good-quality audio with minimal background noise and avoiding overlapping speech or multiple spoken languages when possible. That's good advice for any automated transcription system. Always review the generated captions before publishing, especially if the video contains names, technical terms, product names, or specialized vocabulary.
Resize Videos for Different Platforms
One video doesn't always fit every platform. A landscape video may look natural on YouTube, but a vertical composition may work better for short-form social content. Square formats can also be useful in certain feeds.
Clideo's current tools include video resizing and cropping with presets for social media formats. This can make repurposing content much easier. Instead of recording separate footage for every platform, you can take a strong piece of existing content and adapt its framing. Just remember that resizing isn't always as simple as changing dimensions. You may need to reposition the subject, move text, or crop out unnecessary background elements so the new composition still looks intentional.
Compress Large Video Files
High-quality footage can produce large files, and large files can become a headache when you're trying to upload or share them. A video compressor can reduce file size and make a video easier to transfer or store.
Clideo currently provides a dedicated video compression tool as part of its online media toolkit. The goal shouldn't be to make the smallest possible file at any cost. Excessive compression can reduce image quality, introduce visible artifacts, and make footage look soft. Instead, think about where the video is going. A file intended for quick sharing may need different compression from a high-quality master that you plan to archive.
Use Clideo for YouTube Videos
YouTube creators need more than a basic trimming tool. A typical video may require multiple clips, background music, titles, captions, images, and changes to aspect ratio or speed. Clideo currently provides a dedicated YouTube video editor page and describes its online editor as a browser-based tool for combining videos and adding elements such as text, stickers, and music.
For a simple YouTube workflow, start by building a rough cut. Remove mistakes and unnecessary pauses first. Then add supporting visuals, music, titles, and captions. Finally, watch the complete video from beginning to end before exporting. It's surprisingly easy to miss a tiny mistake when you're editing individual sections, while a full playback often reveals pacing problems that weren't obvious during the editing process.
Create Short-Form Social Videos
Short-form content demands a different editing style. You have less time to communicate the point, so every second matters. A long introduction that might be acceptable in a traditional video can feel painfully slow in a short clip.
Clideo's current editor supports square, vertical, and landscape formats, while its broader tools include resizing, cropping, text, subtitles, stickers, and other functions useful for social content. Use these features to keep the composition focused. If your main subject is a person speaking, make sure the crop doesn't cut off their face or important gestures. If text appears on screen, check it on the actual format you're publishing rather than assuming it will look fine everywhere.
Add Images, Stickers, and Other Elements
Video doesn't have to consist entirely of moving footage. Images, graphics, stickers, shapes, and text can help explain ideas or break up repetitive visuals.
Clideo's current toolset includes elements such as stickers, emojis, shapes, photos, and images, as well as options for creating slideshows and combining different media types. The key is restraint. Adding an element simply because you can doesn't necessarily improve the video. Every visual should have a job: explain, emphasize, identify, entertain, or guide the viewer.
Record Audio and Video Directly
Sometimes you don't need to leave the editor to create another piece of media. Clideo's current Video Editor supports browser-based recording for audio and video, according to its help documentation. This can be useful for quick voiceovers, demonstrations, or supplementary footage.
Imagine you're making a tutorial and realize that one explanation would be clearer as a short voiceover. Instead of recording it separately, transferring the file, and importing it, a browser-based recording workflow can reduce those steps. Small conveniences like this may not sound dramatic individually, but they can make the overall editing process feel much smoother.
Explore AI Features When They Save Time
AI is becoming part of the video editing workflow, but you don't need to use every AI feature just because it exists. Clideo's current editor includes an AI Agent and AI Media Generator, while its broader toolset also includes AI-assisted subtitle and translation workflows.
The best way to approach these features is to ask what repetitive task they can remove. If automatic subtitles save you from manually transcribing a ten-minute interview, that's valuable. If text-to-speech helps you create a quick narration draft, that can also be useful. But the final creative decisions should still belong to you. AI can accelerate production, but it doesn't automatically know what your audience should care about.
Improve Your Editing Workflow
A good workflow can make an average editor feel much better. Before opening Clideo, decide what the video is supposed to accomplish. Are you explaining something? Selling something? Teaching a skill? Entertaining viewers? Once the goal is clear, every editing decision becomes easier.
Try working in stages instead of attempting everything simultaneously. First create the rough cut. Then improve pacing. After that, add audio and music. Add text and subtitles next. Finally, check the visual composition and export settings. This approach keeps the process manageable and prevents you from spending twenty minutes perfecting a transition that later gets removed because the entire section doesn't belong in the video.
Who Should Use a Clideo Video Editor?
Clideo is a sensible option for people who want simple online video editing without installing traditional editing software. That includes beginners, social media creators, marketers, teachers, freelancers, small businesses, students, and casual YouTube creators.
It can also be useful for people who move between devices. Clideo's current resources describe browser-based access across modern devices, while its broader platform includes an iOS app and synchronization features for supported workflows.
That doesn't mean it's the perfect choice for every professional editor. Someone working on extremely complex productions may need specialized desktop software with deeper controls. But if your priority is getting everyday videos edited efficiently, the simplicity of an online workspace can be a genuine advantage.
Common Mistakes to Avoid
The first mistake is trying to use every feature. You don't need animated stickers, elaborate transitions, multiple effects, and ten layers of text in every project. Good editing is usually less about adding things and more about choosing what deserves to stay.
Another mistake is skipping the preview stage. Always watch the complete video before publishing. Listen for audio problems, look for spelling mistakes, check subtitle timing, and make sure text isn't sitting outside the visible area. Also check the final export rather than assuming that the timeline preview tells the whole story.
Finally, don't judge an editor only by its feature list. A tool can have hundreds of features and still be frustrating to use. The best editor is the one that helps you turn raw footage into finished content without creating unnecessary friction.
A Simple Clideo Video Editing Workflow
If you're new to Clideo, you can keep your first project simple. Start with one video and follow a repeatable sequence:
- Upload your media. Bring in your video, images, and audio.
- Create the rough cut. Remove mistakes, silence, and unnecessary footage.
- Arrange the timeline. Put your clips in a logical order.
- Adjust the frame. Crop or resize the video for its intended platform.
- Add text. Include titles or information that genuinely helps the viewer.
- Add subtitles. Generate them automatically when appropriate, then review them.
- Balance audio. Make narration clear and keep background music under control.
- Preview everything. Watch the complete project before exporting.
- Export the finished video. Choose settings appropriate for the intended destination.
Once this becomes familiar, you can experiment with more advanced functions. The goal is to create a repeatable system rather than reinventing your editing process every time you open the editor.
Conclusion
Clideo Video Editor offers a straightforward approach to online video editing by bringing many common production tasks into a browser-based environment. Its current feature set includes a multi-track editor, video and image support, audio tools, text, subtitles, resizing, cropping, compression, transcription, translation, recording, and AI-powered functions.
For beginners, the biggest advantage may simply be accessibility. You don't have to start by mastering an enormous professional application. You can begin with trimming and arranging clips, then gradually explore subtitles, music, text, resizing, and other features as your projects become more ambitious.
The smartest way to use any online video editor is to focus on the result rather than the number of buttons available. Start with a clear idea, remove unnecessary footage, keep the pacing natural, make the audio easy to understand, use subtitles where they help, and choose the right format for your audience. With that approach, Clideo becomes more than a collection of editing tools; it becomes a practical part of a repeatable content workflow.
FAQs
1. Is Clideo Video Editor good for beginners?
Yes. Clideo is designed as a browser-based editing platform, and its current resources emphasize a user-friendly workflow for common tasks such as trimming, resizing, adding text, audio, transitions, and subtitles.
2. Can I use Clideo without downloading software?
Yes. Clideo describes its platform as browser-based and says its tools don't require software installation.
3. Does Clideo have an auto subtitle generator?
Yes. Clideo currently offers automatic subtitle generation. Generated subtitles can be edited and styled, and users can download subtitle files such as SRT or TXT where supported.
4. Can Clideo resize videos for social media?
Yes. Clideo's current toolset includes video resizing and cropping with presets intended for different social media formats.
5. Is Clideo free?
Clideo provides free access for visitors and registered users, with usage limitations. It also offers Clideo Pro through paid monthly or annual plans with additional capabilities and higher limits.