How to Improve Product Pages Using WooCommerce Variation Swatches (Radio Buttons, Colors, Images)
A customer lands on your product page for a t-shirt. They see a dropdown menu labeled "Color." They click it. A list appears with 12 options. They scroll, find their color, select it. The page reloads. They're not sure if the color changed. They click the dropdown again to verify. They're confused.
This is the default WooCommerce experience. It works, but it's clunky.
Now imagine instead: the same product page shows color swatches. Ten colored circles representing each available color. The customer clicks the blue circle. The product image instantly updates showing the blue version. The price updates if the variant costs differently. Everything happens smoothly. No confusion. No page reloads. The experience feels modern and intuitive.
This difference matters. Customers make buying decisions faster when variations are displayed visually. Conversion rates increase. Cart abandonment decreases. Customer satisfaction improves. This is what a WooCommerce color swatches plugin delivers.
Why Default Dropdowns Fall Short
WooCommerce's default variation system uses dropdown menus. This works for simple cases. But dropdowns have limitations. Dropdowns hide options. Customers must click to see choices. This adds friction. For products with many variations (size, color, material), customers must open multiple dropdowns sequentially.
Dropdowns don't show variation options visually. If a product comes in navy, sky blue, and cobalt, customers can't distinguish these shades from a list of text labels. They must guess or remember their preference.
Dropdowns don't update product images. Customers select a color from a dropdown. The image stays the same. They can't preview how the product looks in that color before buying. This creates post-purchase disappointment.
Dropdowns make mobile shopping tedious. On phones, dropdown menus expand across the full screen. Selecting variations becomes cumbersome. Mobile abandonment increases.
For these reasons, modern e-commerce sites moved beyond dropdowns. Visual swatches became the standard. Customers expect them.
How Variation Swatches Improve the Shopping Experience
Variation swatches for WooCommerce make a big difference when it comes to how customers interact with product options.
Visual Selection
Instead of reading text labels, customers see visual representations. A color swatch shows actual colors. An image swatch shows how the product looks in that variation. Customers make informed selections immediately.
Instant Feedback
When customers click a swatch, changes happen immediately. The product image updates. The price updates if that variation costs differently. The stock status updates. Customers see real-time feedback confirming their selection.
Faster Decision Making
Visual selection is faster than reading dropdown lists. Customers scan swatches, click their preference, move forward. Fewer clicks equals faster checkout. Faster checkout equals fewer abandoned carts.
Better Mobile Experience
Swatches work beautifully on mobile. Colorful circles or images are easy to tap. No dropdown menus cluttering the screen. The mobile shopping experience feels native and smooth.
Increased Conversion
Studies show product pages with visual variation options convert 15-30% higher than pages using text dropdowns. Customers who can see options visually are more confident in their purchase.
Reduced Returns
When customers preview variations with images, they know exactly what they're getting. Fewer surprises lead to fewer returns. Return rates often drop 20-40% after implementing visual swatches.
Types of Variation Swatches
A WooCommerce color swatches plugin supports multiple swatch types, each suited to different product types.
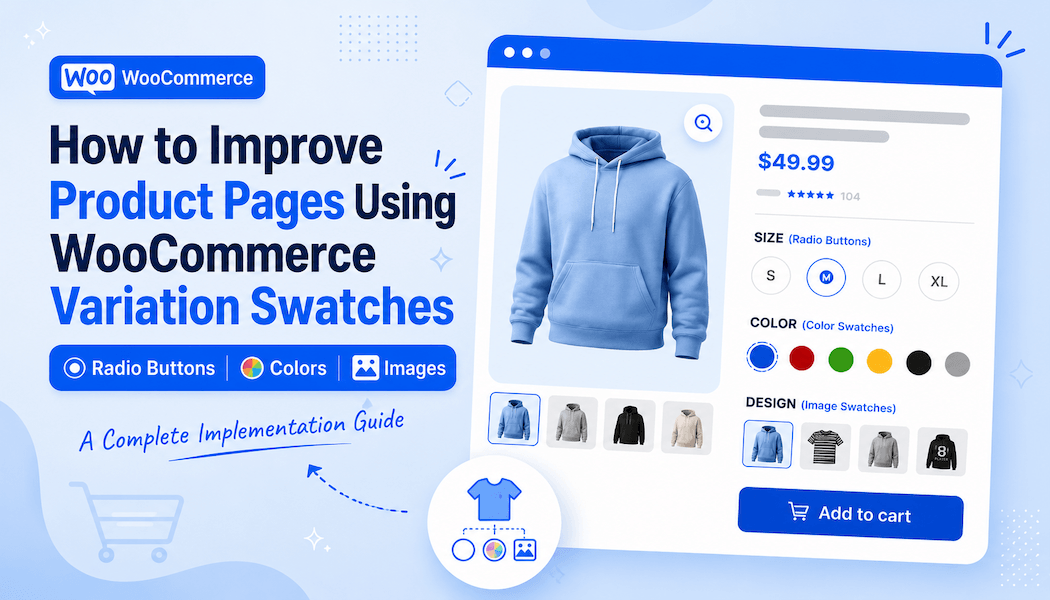
Color Swatches
Perfect for products available in colors: clothing, home decor, accessories. A color swatch is a small square or circle displaying the actual color. Customers instantly see available shades. Dual-color swatches show products with multiple colors in one variation.
Image Swatches
Perfect for products with visual variations: patterns, styles, designs. Instead of a color block, an image swatch shows a thumbnail preview. Customers see the actual pattern or design before selecting.
Radio Button Swatches
Perfect for non-visual variations: size, material, style, fit. Instead of text dropdowns, radio buttons display as clickable boxes with text labels. They're faster than dropdowns and more scannable.
Text Label Swatches
For simple variations, text labels displayed as clickable buttons. Not as visually appealing as colors or images, but cleaner than dropdowns.
Each swatch type works better for different scenarios. A color swatches plugin supporting all types lets you choose what fits each product.
Setting Up Variation Swatches: Implementation Guide
Implementing a WooCommerce color swatches plugin follows a straightforward process.
Step 1: Install the Plugin
Download the plugin from your WooCommerce account. Navigate to WordPress Admin > Plugins > Upload Plugin. Select the downloaded .zip file. Install and activate.
After activation, a new "Variations Swatches" tab appears under WooCommerce > Settings.
Step 2: Configure General Settings
Navigate to WooCommerce > Settings > Variations Swatches > General Settings.
Out-of-Stock Display: Choose how to handle variations without inventory. Cross out unavailable swatches, blur them, or hide them completely. Hiding prevents customers from seeing sold-out options. Crossing out or blurring shows inventory status without hiding options.
Product Image Changes: Set whether product images update on click or hover. Click is more explicit. Hover is faster but requires more precise interaction on mobile.
Display Scope: Choose whether swatches appear on all variable products or only selected ones. Start with all products for consistency.
Generate Variation URLs: Enable this to create shareable links for specific variations. A customer finds the perfect variant and shares the link. Others land on that exact variation without reselecting. This increases referral conversions.
Shop Page Display: Choose whether swatches appear on shop listings. Showing swatches on shop pages lets customers preview variations without entering product pages. This speeds browsing but requires more space per product.
Step 3: Customize Shape and Appearance
Navigate to Shape Settings to customize how swatches look.
Shape Style: Choose round or square swatches. Round feels modern and friendly. Square feels structured. Pick whichever matches your brand.
Size: Set width and height in pixels. Larger swatches are easier to click on mobile. Smaller swatches take less space on pages. Balance between usability and space. 30-40px is typical.
Font Size: If using text labels, adjust font size for readability.
These settings apply globally to shop pages.
Step 4: Set Up Tooltips
Navigate to Tooltip Settings to configure hover information.
Enable Tooltips: When customers hover over swatches, tooltips appear showing additional information. For color swatches, the tooltip might show the color name (Navy Blue, Sky Blue, Cobalt). For size swatches, the tooltip might show detailed dimensions.
Tooltip Content: Choose between text or image. Text tooltips show the variation name. Image tooltips show a preview image. Image tooltips are more helpful for visual variations.
Appearance: Set background color, text color, and font size to match your brand.
Step 5: Configure Borders
Navigate to Border Settings.
Border Style: Swatches can have borders or be borderless. Borders make swatches more distinct, especially when packed together. Borderless feels cleaner for spacing-conscious designs.
Border Color: Choose a color matching your brand. Often matches your primary text color.
Step 6: Map Attributes to Swatch Types
This is where you connect your product attributes to specific swatch types.
Navigate to Map Attributes to Swatch Type. You'll see all attributes created in your WooCommerce store.
For each attribute, assign a swatch type:
- Color attribute > Color Swatch
- Size attribute > Radio Button or Text Label
- Pattern attribute > Image Swatch
- Material attribute > Radio Button
This mapping determines how each attribute displays across your entire store.
Step 7: Configure Product-Level Settings
For specific products needing custom swatches, override global settings.
Edit the product. In Product Data, click the Attribute Swatches tab.
Enable Product-Level Customization: Check this to override global settings for this specific product.
Select Attributes for Shop Page: Choose which attributes display on shop listings. For a t-shirt available in color and size, you might show color on shop pages (visual selector) but not size.
Customize Swatch Appearance: For this product, set custom shapes, sizes, and styles. Product-level settings take priority over global settings.
Step 8: Test and Launch
Before going live, test the complete experience.
Visit a product page. Verify swatches display correctly. Click swatches and confirm product images update. Verify prices update if variants cost differently. Check mobile display. Test on phones and tablets.
Test all swatch types used in your store. Color swatches, image swatches, text labels, all should work smoothly.
Test shop page display if enabled. Verify swatches appear and function on product listings.
Once satisfied, your variation swatches are ready for customers.
Best Practices for Effective Variation Swatches
Implementation is step one. Optimization improves results.
Use Accurate Colors
Color swatches must represent actual product colors. Inaccurate colors frustrate customers and increase returns. If your product is navy blue, the swatch must be navy blue, not black. Test colors on multiple monitors to ensure consistency.
Provide Clear Variation Names
Swatch tooltips should be descriptive. "Navy" is less helpful than "Navy Blue." "S" is less helpful than "Small." Clear names reduce confusion and customer support questions.
Show Stock Status Clearly
When variations are out of stock, make it obvious. Blur or cross out unavailable swatches. Some customers don't notice these signals. Consider adding text like "(Out of Stock)" next to swatches.
Optimize Swatch Size for Mobile
Test swatch sizes on phones. If swatches are too small, customers struggle clicking the right one. If too large, they take excessive space. 35-45px is usually optimal for mobile.
Use Image Swatches for Complex Variations
For variations difficult to describe with colors or text (patterns, styles, designs), image swatches work best. A thumbnail preview beats any text description.
Limit Swatches Per Product
If a product has 20 color variations, showing 20 swatches clutters the page. Consider grouping colors (Show 6 most popular, hide others) or displaying in multiple rows.
Test on Mobile Extensively
Most e-commerce traffic comes from mobile. Test swatch functionality on actual devices, not just browser emulation. Ensure swatches are touch-friendly and responsive.
Results You Should Expect
After implementing variation swatches properly, expect improvements in:
Conversion Rates: 15-30% increase as customers select variations more confidently.
Average Order Value: Customers exploring variations visually often select premium versions (larger sizes, higher-priced colors).
Return Rates: 20-40% decrease as customers preview variations before purchasing.
Mobile Conversions: 25-50% increase as swatches work better on mobile than dropdowns.
Customer Satisfaction: Improved feedback as shopping experience feels modern and intuitive.
Track these metrics before and after implementation. Data shows whether your variation swatches are working.
Conclusion: Visual Swatches as Conversion Tool
Dropdown menus work, but they're outdated. Modern customers expect visual variation options. A WooCommerce color swatches plugin transforms product pages from functional to beautiful, from confusing to clear, from abandonment-prone to conversion-optimized.
Implementation takes a few hours. The payoff comes from every customer purchasing with confidence, every product preview reducing returns, every mobile shopper completing checkout smoothly.
Start with your highest-traffic products. Implement swatches. Monitor conversion improvements. Then expand to your entire catalog. Your conversion metrics and customer satisfaction will improve significantly.
Modern e-commerce expects visual variation selection. Give customers what they expect. Your sales will thank you.