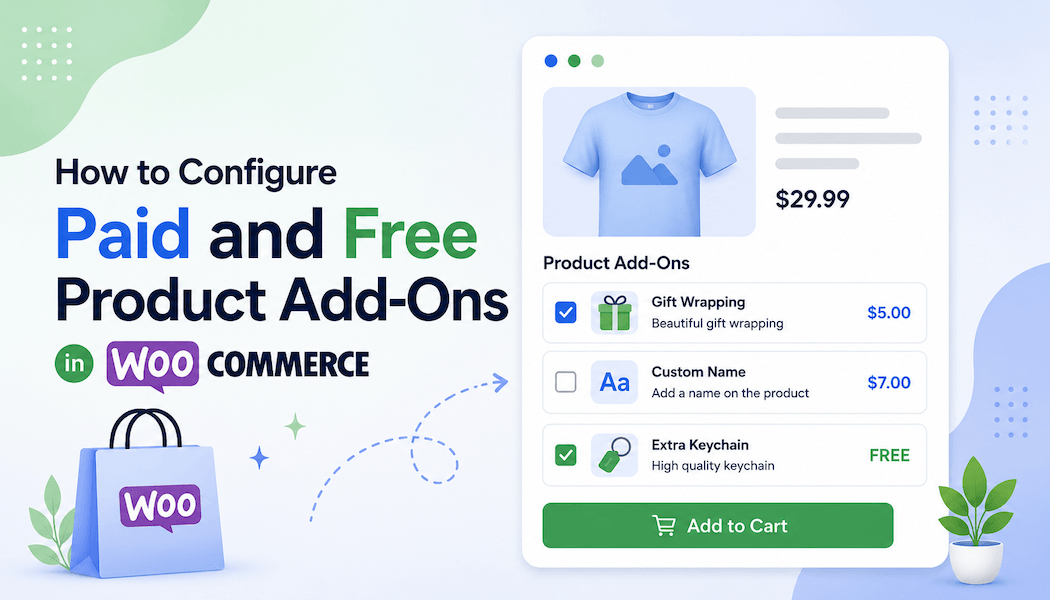
How to Configure Paid and Free Product Add-Ons in WooCommerce
Your customers want to customize their purchases. They want to add personalization. Upgrade features. Choose options. Specify requirements. But your standard WooCommerce product pages don't give them that flexibility.
Without customization options, you're limiting sales potential. Customers settle for less-than-perfect products. Or they shop elsewhere. You miss opportunities to increase order value through paid add-ons.
The WooCommerce product addons can be considered a very useful plugin in such situations. They let you add flexible options to products. Some free. Some paid. Customers choose what they want. Their customization is captured. Order value increases.
But many store owners don't implement product add ons WooCommerce because they think it's complicated. Requires coding. Requires developer help. It doesn't. Modern solutions make configuration simple and visual.
This guide walks you through configuring both paid and free product add-ons in WooCommerce. Step by step. From installation to live configuration.
Why Paid and Free Add-Ons Matter
Before diving into setup let's understand why this matters for your business.
Free add-ons capture customer information. Monogram text. Engraving specifications. Custom messages. Delivery instructions. Information you need to fulfill orders accurately.
Paid add-ons increase revenue. Gift wrapping costs extra. Premium materials cost extra. Expedited shipping costs extra. Customers adding these paid options increase your average order value.
The combination is powerful. Free add-ons improve fulfillment accuracy. Paid add-ons increase revenue. WooCommerce product addons enable both simultaneously.
Most stores using this strategy report 15-30% increases in average order value. That's significant revenue improvement from a single feature.
Understanding Product Add Ons WooCommerce
A product add on WooCommerce is an optional or mandatory field that customers fill out when ordering a product.
It might be a text field for personalization. A dropdown for choosing options. A checkbox for yes/no decisions. A file upload for custom designs. Whatever customization your products need.
The key difference from standard product variations is flexibility. Variations are predefined options. Add-ons are flexible fields your customers interact with directly.
A text field for monogramming is an add-on. A dropdown for choosing filling flavor is an add-on. A file upload for logo placement is an add-on.
Each add-on can be free. Or it can have a price attached. Customers see the price. Make their choice. Their decision updates their order total automatically.
This is why product add ons WooCommerce are different from regular product customization. They're flexible. They capture specific information. They can be monetized.
What You'll Need Before Starting
Before configuring WooCommerce product addons make sure you have:
A WooCommerce store installed and activated. WordPress admin access. The Product Addons and Custom Fields Manager plugin by FmeAddons downloaded and ready to install.
That's it. No coding knowledge needed. No technical background required. Just WordPress admin access and the plugin.
Step One: Installation
Getting WooCommerce product addons running starts with installation.
Go to your WordPress admin panel. Navigate to Plugins. Click Add New.
Upload the Product Addons and Custom Fields Manager plugin .zip file. Click Install Now.
After installation click Activate Plugin. The plugin is now active in your WooCommerce store.
Navigate to WooCommerce > Settings. You'll see a new tab called Custom Product Fields. This is where you'll configure all your product add ons WooCommerce.
Step Two: Understanding the Configuration Interface
Before creating your first add-on understand what you're looking at.
In WooCommerce > Settings > Custom Product Fields you see two main sections: Create New Rules and Manage Rules.
Rules are groups of add-ons that you apply to products. You might create one rule called "Personalization Options" with text fields for names and messages. Another rule called "Gift Options" with wrapping choices.
Each rule contains multiple add-on fields. Each field can be free or paid. You decide.
This organization keeps things manageable. Related add-ons go in the same rule. You apply the rule to products. Everything stays organized.
Step Three: Create Your First Rule
Now let's create your first WooCommerce product addons rule.
Click the Add New Rule button in the Custom Product Fields section.
You're now in the rule creation interface. Give your rule a name. Something descriptive. "Monogramming Options" or "Gift Wrapping Choices" or "Custom Design Upload."
Enable the rule so it activates. This checkbox makes the rule live.
Now you're ready to add individual fields to this rule.
Step Four: Add Your First Free Add-On
Let's add a free add-on first to understand the process.
Click Add New Field. You see a list of 19 available field types. Text. Textarea. Number. Telephone. Email. Password. Select. Multiselect. Checkbox. Radio Button. Radio Image. Radio Color. Date Picker. Time Picker. Color Picker. File Upload. Heading. Paragraph. Google Map.
For a free add-on let's choose Text field. This is for simple text input like a name or personalization text.
Set the Field Name. This is internal tracking. "Customer Name" or "Monogram Text."
Set the Field Label. This is what customers see on your store. "Enter Your Name" or "What text do you want monogrammed?"
Set the Field Price to 0. This makes it free.
Leave the Placeholder text blank unless you want to guide customer input. This is optional.
Make it Optional or Mandatory. If customers must fill it before checkout mark it mandatory. If they can skip it mark it optional.
Save this field. You've created your first WooCommerce product addons free field.
Step Five: Add Your First Paid Add-On
Now let's add a paid add-on to the same rule.
Click Add More Field to add another field to your existing rule.
Choose your field type. For a paid add-on let's choose a Checkbox. This works for yes/no options like "Add Gift Wrapping?"
Set the Field Name. "Gift Wrapping Option."
Set the Field Label. "Add Premium Gift Wrapping?" or "Would you like gift wrapping?"
Set the Field Price. This is where the magic happens. $5 for gift wrapping. $10 for premium wrapping. Whatever your pricing is.
Make it Optional or Mandatory. Gift wrapping is usually optional.
Customers see this checkbox on the product page. If they check it the price automatically adds to their order total. Powerful and simple.
Step Six: Configure Multiple Add-On Types
Understanding how to mix different field types gives you flexibility.
A product might have:
A free text field for personalization text. A paid select dropdown for material choice with price variations. A free file upload for custom designs. A paid checkbox for rush processing. A mandatory radio button requiring color selection.
Each field serves a different purpose. Some gather information. Some generate revenue. Mix them strategically.
Step Seven: Set Pricing Strategies
Pricing flexibility is key to maximizing revenue.
Free fields cost nothing. They capture information customers must provide.
Fixed price fields charge the same amount every time. A $5 gift wrapping charge. A $10 rush fee.
Per-item pricing can also be configured. Different products might have different prices for the same add-on.
The plugin automatically calculates the total. Customer selects their add-ons. The price updates. They see exactly what they're paying.
Step Eight: Use Conditional Logic (Optional)
For advanced configurations use conditional logic to show/hide fields based on customer selections.
Example: If a customer selects "Gift Wrapping" a free text field for "Gift Message" automatically appears. If they don't select gift wrapping the message field doesn't show.
This keeps your product pages clean. Customers only see relevant fields.
Configure AND/OR logic between fields. If Product Type is "Premium" AND Gift Wrapping is Selected THEN show Personalization Charges.
This creates sophisticated customization workflows without overwhelming customers.
Step Nine: Assign Your Rule to Products
Creating a rule means nothing if you don't assign it to products.
In the Display Settings section of your rule select which products or categories this rule applies to.
You can assign to:
Specific products (hand-select individual items) Specific categories (applies to all products in those categories) All products (applies everywhere)
This flexibility lets you customize by product type. Electronics products have different add-ons than clothing. Pricing might differ too.
The system automatically applies the rule to matching products.
Step Ten: Make Fields Mandatory or Optional
Control how strict you want to be about customer input.
Optional fields let customers skip them. Not everyone needs personalization. Not everyone wants gift wrapping.
Mandatory fields force customers to fill them before checkout. If you need specific information for fulfillment mark it mandatory.
A mandatory Color Selection field means customers must choose. You can't miss this detail. A mandatory Custom Instructions field ensures you get fulfillment details.
Use mandatory sparingly. Too many mandatory fields frustrate customers. Optional fields are usually better for add-ons.
Step Eleven: Test Your Configuration
Before going live thoroughly test everything.
Add a product to your cart. Check if the add-on fields appear. Try selecting free options. Verify they're free. Try selecting paid options. Verify the price updates correctly.
Test on mobile. Test in different browsers. Test with different product types if you created multiple rules.
Make sure mandatory fields actually prevent checkout if empty. Make sure optional fields work if left blank.
Testing catches configuration errors before customers encounter them.
Step Twelve: Launch and Monitor
Once testing is complete launch your configuration live.
Your products now display customization options. Customers fill them out. Orders include their customizations.
Monitor results. Which add-ons are customers actually selecting? Which paid add-ons increase order value? Which are unpopular?
Use this data to refine your strategy. Maybe a $10 charge is too high. Maybe that free option isn't needed. Iteration improves results.
Practical Examples
Understanding real-world scenarios shows how powerful this is.
Example One: T-Shirt Store
Free add-ons: Text field for name to embroider. Select dropdown for size. Paid add-ons: Checkbox for premium embroidery ($15). Radio buttons for thread color with price ($5 upcharge for specialty colors). Result: Customers add $20-30 in paid add-ons per order. Average order value increases 40%.
Example Two: Custom Cake Shop
Free add-ons: Text field for cake inscription. Select dropdown for flavor choices. Paid add-ons: File upload for custom design ($25). Checkbox for rush processing ($15). Result: Customers paying for file upload and rush processing. Revenue per order increases significantly. Fulfillment details captured perfectly.
Example Three: Gift Shop
Free add-ons: Text field for gift message. Select dropdown for recipient type. Paid add-ons: Checkbox for gift wrapping ($8). Radio buttons for gift bag choice ($3-5). Result: Most customers selecting gift options. Average order value increases. Customers feel like gifts are more special.
Key Features to Remember
Understanding these features maximizes your product add ons WooCommerce implementation.
19 Field Types Available
Text fields for simple input. Textareas for longer text. Dropdowns for choices. File uploads for designs. Color pickers for color selection. Radio buttons for single-choice options. Checkboxes for yes/no. Date pickers for scheduling. Time pickers for timing. Phone fields for contact details.
This variety handles almost any customization scenario.
Pricing Flexibility
Free fields capture information. Paid fields generate revenue. Mix them strategically. Charge $5 here. Charge $25 there. Free options for information gathering. Paid options for premium features.
Rule-Based Organization
Group related add-ons into rules. Apply rules to products or categories. Change one rule and it affects all assigned products. Massive time saver for large catalogs.
Conditional Logic
Show/hide fields based on customer selections. Keep product pages clean. Show only relevant options. Create sophisticated workflows.
Mobile Responsive
Your product add ons WooCommerce display perfectly on phones. Customers fill out forms on mobile without friction. Mobile conversions improve.
Common Mistakes to Avoid
Understanding what doesn't work helps you implement better.
Mistake One: Too Many Paid Add-Ons
If everything costs extra customers feel nickel-and-dimed. Mix free and paid. Let them customize free. Charge only for premium features.
Mistake Two: Mandatory Fields for Everything
Too many mandatory fields frustrate customers. Make fields mandatory only when truly necessary. Usually optional is better.
Mistake Three: Not Testing Mobile
Your desktop configuration might look good but appear broken on phones. Always test mobile before launching.
Mistake Four: Complicated Pricing
Keep pricing simple. Customers should understand what they're paying for. Complex tiered pricing confuses customers.
Mistake Five: Ignoring Field Organization
Related fields should be grouped logically. Don't scatter related add-ons randomly. Organization improves user experience.
Conclusion
Configuring paid and free product add-ons in WooCommerce is simpler than most store owners think.
With WooCommerce product addons you capture customer preferences. You increase order value through paid options. You improve fulfillment accuracy through information capture.
The Product Addons and Custom Fields Manager by FmeAddons makes this straightforward. No coding. No technical knowledge. Just configuration through your WordPress admin.
Your competitors probably aren't using product add ons WooCommerce. You can. This gives you competitive advantage. Higher order values. Better customer satisfaction. Improved fulfillment accuracy.
Start simple. Add one rule. A few add-ons. Test. Refine. Expand from there.
Your customers deserve the ability to customize. Your business deserves the revenue boost. WooCommerce product addons deliver both.