
How to Customize WooCommerce Thank You Pages by Product, Category, or Payment
If you’re running a WooCommerce store, then you already know how important the checkout process is. But what happens after that is often ignored. That last step thank you page, usually just confirms the order and sends people on their way. Nothing more.
That’s where the Customized Thank You Pages for WooCommerce plugin comes in. This plugin gives store owners full control over what customers see after placing an order. It lets you create different thank you pages based on the product, category, or payment method. You can redirect users to any page on your site, to a product, category, or even an external link. You can also build these pages using shortcodes to show order info, customer details, and other stuff that makes the page useful.
Whether you want to give instructions after a digital product, show shipping info, or redirect people to a help center, you can do it all with this plugin.
Let’s go over how you can use it to set up thank you pages that make sense for your customers.
What's the WooCommerce Thank You Page and Why Customize It?
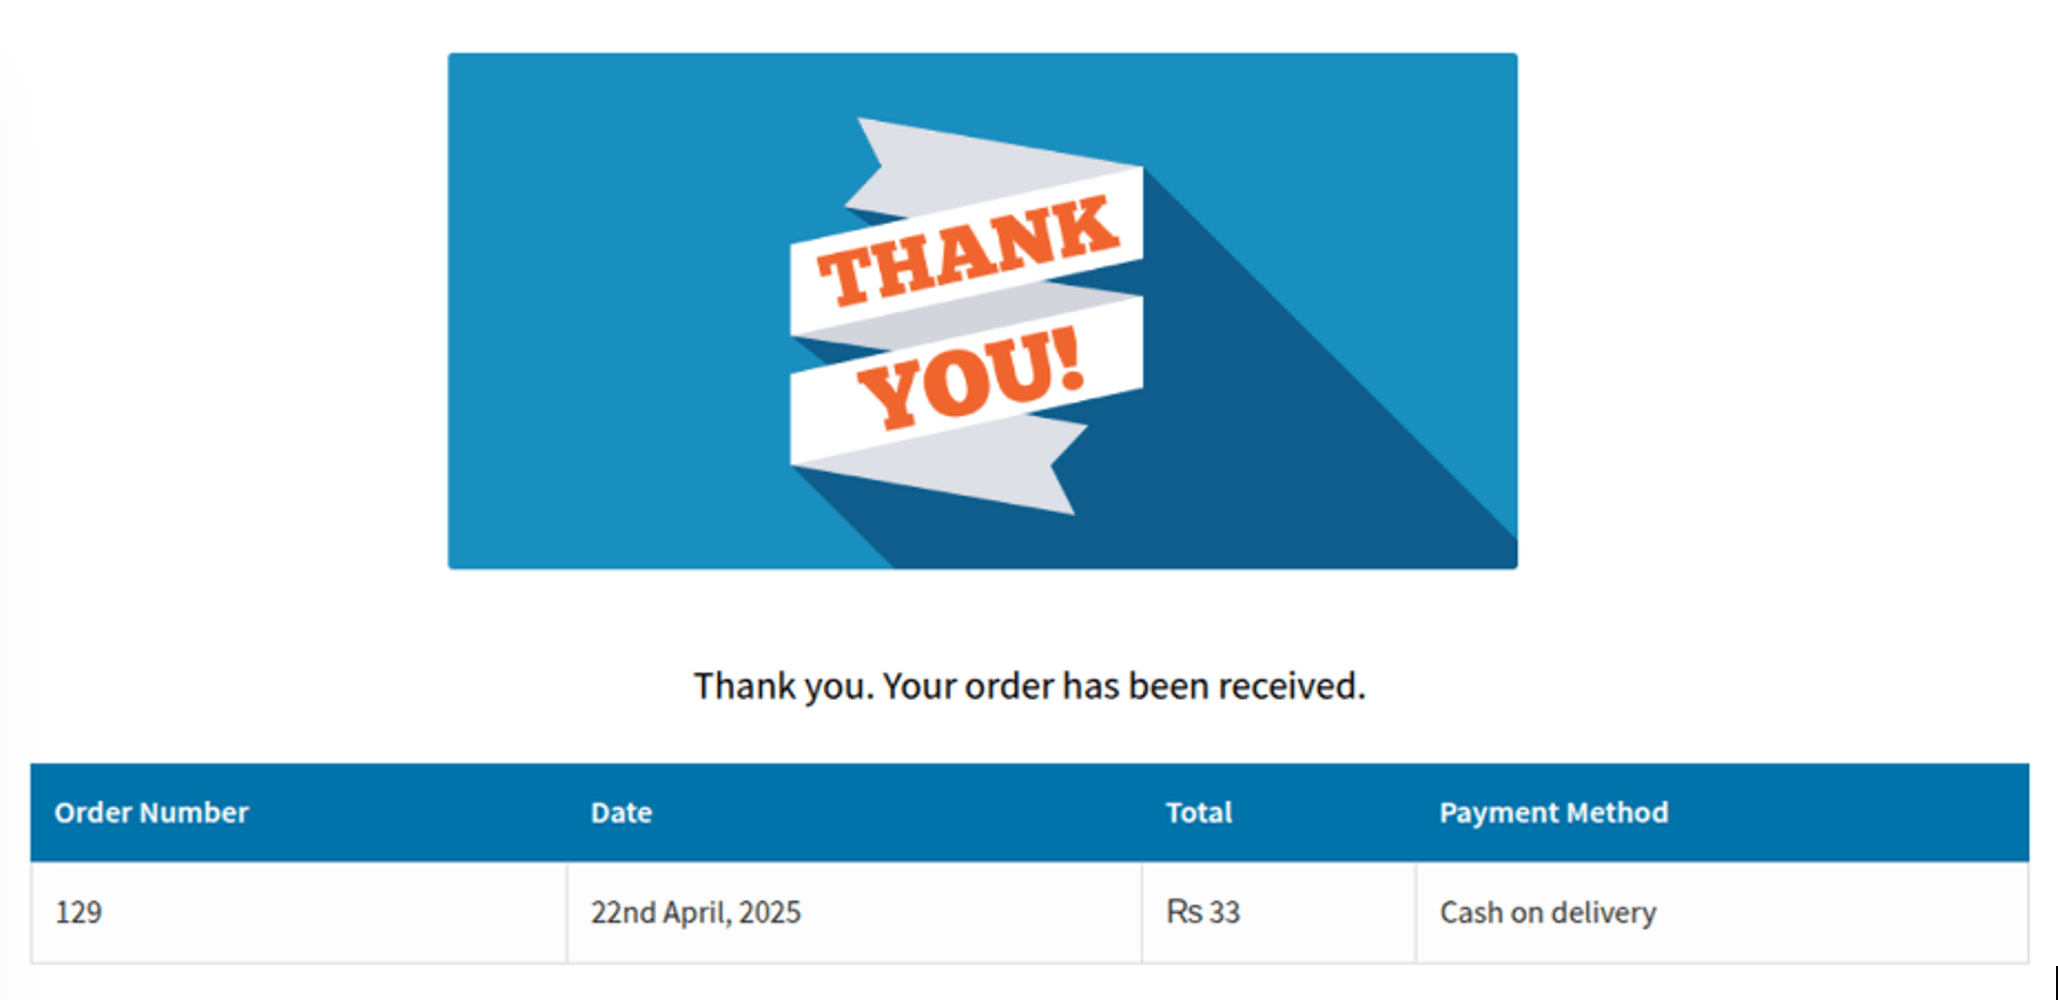
Basically, the thank you page shows up after a user is done with the checkout process. This page contains basic information such as the order number, the total amount, and the payment method.
The problem is, it looks the same for every order. Whether the customer bought a t-shirt or paid for a digital course, they get the same page. No extra instructions. No links. No real direction.
Customizing this page gives you the chance to tell people what they should do next. You can explain what happens now, give them download instructions, tell them when to expect delivery, or even offer them a discount for their next purchase. It makes your store look more professional as well, and if people feel like they are being looked after, they will be much more likely to come back!
The Problem with WooCommerce’s Default Thank You Page
The default thank you page in WooCommerce is plain. It just confirms the order and nothing else.
There's no option to redirect people anywhere. No way to change what the page shows based on the order. No layout options. You can’t show your messaging unless you edit core files or write custom code.
This means most stores waste an opportunity. That moment after the sale, when the customer is still paying attention, is completely blank. Nothing useful, nothing helpful.
By not saying or showing anything more, you leave the customer guessing. Do they need to wait for something? Should they check their email? What if they chose cash on delivery?
All of that could be solved with a custom thank-you page. And that’s where this plugin helps.
How to Create a Custom Thank You Page in WooCommerce
With the WooCommerce Thank you plugin making a custom thank you page is pretty simple. You don’t need to write code or edit templates.
You just go to the Pages section in your WordPress admin, and click “Add New.” Then you can build the page like any other. The plugin gives you shortcodes that you can paste into show order summaries, customer info, or headers.
It also lets you style the page, change font size, colors, table headers, and so on, so it fits your store.
You can make as many thank you pages as you want. One for each product, each category, or just a general one for everyone.
Once the page is ready, you can go into WooCommerce settings and assign it based on your rules.
Redirect Customers After Purchase Based on Specific Products
This is one of the most useful features of the plugin. You can make the thank you page change depending on what product was ordered.
For example, let’s say someone buys a digital download. You can send them to a page with download links and step-by-step instructions.
Or maybe they buy a physical product that requires setup, like a chair or a tool. You can send them to a page that has setup videos, manuals, or contact info in case they have trouble.
All you need to do is create the page, then set up a rule under WooCommerce > Thank You Page Rules. You assign the product, select the thank you page, and save.
The next time someone buys that product, they’ll go to the page you picked.
Set Up Category-Based Thank You Pages to Keep Things Simple
It won’t make sense if you create a page for each product, especially if you have a lot of them. That will simply be too time-consuming.
Instead, you can group your products by category, like Electronics, Furniture, Apparel, or Digital Items, and make one thank you page for each.
Let’s say all your digital items go under one category. You can build a single thank-you page with download instructions, support links, and whatever else they need. Then assign it to that category.
Same for physical items. Maybe you want to show delivery timelines and return policies.
You simply need to create the page once and then link it to all the categories. It is easy to manage and will still feel more personal to each customer.
Customize the Thank You Page Based on Payment Method
Not everyone pays the same way. Some people use PayPal, others go for bank transfer or cash on delivery.
The next steps are different for each. If someone pays with PayPal, the order is already confirmed. But if they choose bank transfer, they might need to send money manually.
The plugin lets you redirect customers based on the payment method they used. So if someone picks bank transfer, they can be sent to a page with your bank details and steps to complete the payment.
Cash on delivery? Maybe you want to show a note explaining how and when delivery will happen.
You can set this up under the Payments Method tab in the plugin settings. Just select the payment type and enter the URL of the page you want to use.
Use Shortcodes to Display Order and Customer Details
A thank you page feels incomplete if it doesn’t confirm what the customer just ordered.
This plugin gives you shortcodes to drop order tables, customer names, emails, and other info into any custom page. You just copy the shortcode and paste it where you want.
That way, the customer sees a summary of what they bought. They get a sense of confirmation and don’t feel the need to email support to ask if the order went through.
The shortcodes are simple to use and don’t require any coding. Even if you’re not technical, you can do it in a few clicks.
Set Global Thank You Pages and Prioritize Rules Smartly
If you don’t want to make separate pages for everything, that’s fine too. The plugin lets you set a global thank you page. This page will be used when no other rule applies.
You can also set rule priority. So if a customer’s order matches more than one rule, the plugin will follow the rule with the highest priority.
This gives you full control. You can decide what’s the most important product-based page, category, or payment type and assign the order they should apply.
Final Thoughts: Give Customers a Clearer Post-Purchase Experience
A lot of stores miss the mark by not doing anything after checkout. They think the job is done once payment is made. But that last step, the thank you page, is where you can stand out.
With the Customized Thank You Pages for WooCommerce plugin, being stuck with a one size that fits all kinds of messages will not be a problem anymore. You now have control over exactly what your customer needs to see. All that will be based on what the customer has bought and how they paid for it.
Ranging from download links, setup guides, payment instructions, to even simple confirmations, if you provide the right information at the right time, people will only trust you more.